Fabric Gift Tag Tutorial
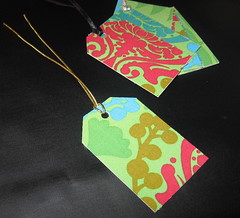
With the Christmas Holidays so close I decided to do a tutorial for some fantastic Fabric Gift Tags that will adorn your holiday parcels. It is a no sew tutorial, for all my friends that don't sew!
Here's what you'll need -
- Gorgeous Fabric - mine was supplied by FabricFusion.etsy.com
- Fusible Webbing (vliseofix)
- Cardstock
- Ribbon
- Rotary cutter or scissors
- Hole Punch
- Ruler
- Iron
Cut Fusible webbing to size desired, each finished tag measures 2” x 3”,
so if you want to make 12 tags cut 6” x 12”
Iron Fusible webbing (vliseofix) onto wrong side of fabric. Make sure the glue side of Fusible Webbing is on the fabric or you will have a sticky mess on your iron. Cut fabric to measured fusible webbing. Peel off the paper.
 Place fabric on cardstock, printed side of fabric up and iron in place.
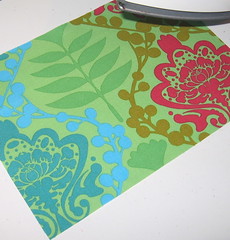
Cut into strips 2” strips then cut into 3” rectangles

Use a hole punch to carefully make a hole for ribbon or string. You may find that the fabric gets caught a little in the hole punch, gently snip with sharp scissors. Cut the corners of one end for a real tag look.
Attach ribbon, write a lovely message on the back and attach to your parcel!
Visit Fabric Fusion blog for more details of the Free Fabric Tutorial Exchange